I decided to look on Craig's List for my next project.
Amy felt she had enough little tables in her shop, Maison Decor, so I wanted to find a chair to redo.
I thought I had found something that wouldn't kill me to tackle.
I was wrong.....
I AM NOW DEAD!!!!!
And am writing this from beyond the grave....
(I'm gearing up for Halloween...)
This is what I saw in the Craig's List ad.....
But the seller stripped the fabric off after she took this picture, so by the time I drove out to pick up the chair, it was just the frame with all the staples and tacks still in place.
I like to be able to strip the chair myself.....
This way I can see how it was done, and it acts as somewhat of a tutorial about how to redo it.
It's always a good idea to take pictures as you strip a piece of furniture, because you'll believe that there is
NO WAY
you'll forget how it was done......
BUT YOU WILL!!!!!!!!
The seller told me she would email me the pictures she had taken when she stripped it.....
but she already had my money.....
AND SHE NEVER DID.....
So this is what I got.....
This was the way the springs looked.....
This is the way the frame looked.....
These are just some of the tacks I pulled out of this monster.....
So, without any pictures of the stripping process I was on my own.
NEVER MIND!!!!!
I have my buddies at Drape It
(my drapery/upholstery workroom)
(also some of my best friends)
for advice.
So I hauled the chair over there for a consultation with Gil
their resident expert.
He is my guru.
I started by taking all the old ties off the springs.....
So, now it was stripped of all the tacks and ties.
IT WAS READY FOR IT'S NEW FINISH!!!!!
I began with a coat of French Linen.....
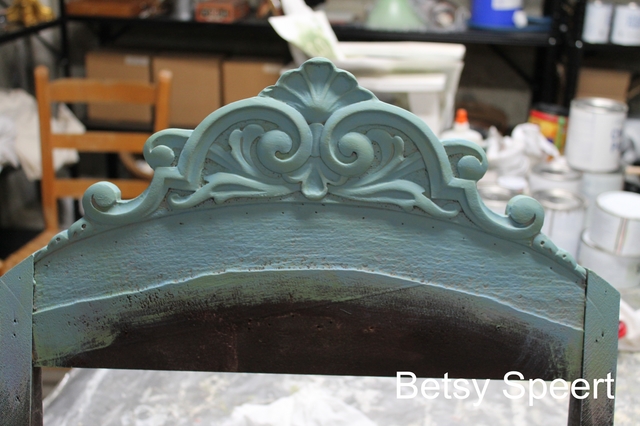
So the carved top went from this.....
To this.....
Here's the frame all painted with one coat....
THEN THE RED TANNIN STARTED BLEEDING THROUGH!!!!
So I had to go get some spray shellac to seal the frame.
At this point, I stood back and thought about how I wanted to place the fabric.
There were several options.
One way was the way it had been done, with the fabric wrapping around the legs.
I decided that I wanted the full leg post to show, so I had to fill in the nail holes from the previous upholstery job...
OK, at this point I went crazy with paint.
I was calling Amy every couple of hours telling her I had a paint compulsion and to come over to my house and take the paint away from me.....
The b@#$ didn't rescue me!!!!!
She's the one who sells me the chalk paint, so she was probably thinking...
"Yeah, paint the whole world Betsy with multiple coats!!!!!"
I painted Old White over the French Linen.
Then I painted a mix of Abtibes Green and Greek Blue over the Old White....
Then I painted a mix of Provence and Louis Blue over the green.....
Then I dry brushed French Linen over all that.....
Then I added some dry brushed Old White......
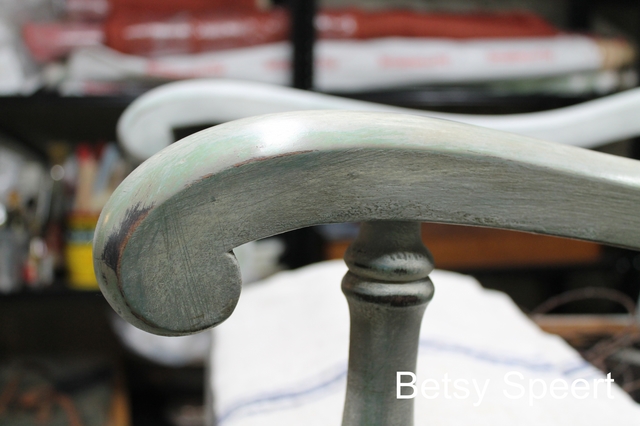
Then I sanded through some of the paint to show the different colors.
Then I waxed it with natural wax, and then added some dark wax.....
You can see the different colors showing through.....
I really like the way it looks on the carvings.....
I realize it's a very subtle effect, and I could have gotten away with just doing a dry brushing of Old White over French Linen.....
but I wanted to try a multi-colored layered effect.
So here is the frame all painted and ready for reupholstering.
I will continue this story with the re-upholstery on Tuesday.....
So, that's it for today....
Latah, Gatah
Partying at:


.JPG)


.jpg)
.jpg)
.jpg)


17 comments:
It's looking lovely and I can't wait to see the finished product!
You are a tease~and you take on much more work than I would.
Do we really have to wait until Tuesday?!
Better get out of my chair and go blow some leaves....no wait! I have a yard boy for that (or husband as I call him some days).
No doubt Amy is hoping for a few more customers like you to help with her retirement fund!
The chair is fantastic. I thought you were putting it in your house with the green, your neice's with the blue, but now I have no idea where it will end up.
You have more patience, to keep painting that chair, than I will ever have if I live to be 150! But it is looking awesome and I can't wait for Tuesday to get here so we can see your progress ~ Mary
Can't wait to see the re upholstery stage I bought one at the same stage as that and have no idea how to redo it. For two dollars I couldn't leave it there though, Waiting patiently until Tuesday.
That chair must weigh at least ten pounds more than when you started with it with all of that paint on it. Good finish tho. ha
Judy
Betsey, you crack me up......
I love the way your chair is turning out, your my guru girlfriend...lol
So looking forward for Tuesday and the end result to your gorgeous chair,
Smiles~
Mari
That chair is great, but I wish you would have started this project before I stripped my couch down to the frame. I didn't take pictures, make notes, or keep any of the parts to use as a pattern because I was sure that I would remember what I took off. Lesson learned. So I've done lots of research about how to basically build a couch. Happy to share any of my research if it will help. It's a shame the owner threw away the "guts" of the chair because I bet it had horse hair which is difficult to find and expensive, if you can find it. I understand that most upholsterers now wash the horse hair and re-use it when they are restoring antiques. Good luck.
Good Lord, you must have the patience of Job. It is sooo pretty, it was well worth all that work. Especially since I am not the one actually doing the work. I can't wait to see the finished chair.
I hope you get some rest between now and then, that looks like a reaaaally big job!
OMG ... if I counted correctly, including the shellac and both waxes, that is nine layers! I'm lucky if I live through the anxiety of trying to get one coat to look good. Your finished product looks amazing! Can't wait to see it when it is reupholstered.
Diane
What a lovely effect the chair has from all that paint! Can't wait to see the finished product!
I can not wait to see you finish this chair......I have the same dang chair in approximately the same condition minus the tacks and the back support fabric! I call it the throne, it is huge. For $40 I could not walk away. Supposedly it is from the 1800's. Seeing you boldly paint gives me courage to also. Antiques Roadshow won't be seeing it, so no sweat.
A beach girl landlocked in ID.
Ok, the chair looks amazing, and I am sure it will be another masterpiece. Please tell me you used the quilt for photo staging and not a drop cloth. It would wound my soul.
Oh boy seeing the photos brings your many phone calls to life!~~I couldn't imagine what the heck it was going to look like when you told me you were doing blue and green etc layer after layer....but in the end it turned out masterful! I have seen the finished product and it is now happily listed in my online store and soon will be in Boston for some lucky shopper to scoop up!
Oh I cannot wait for Tuesday, I have a chair just like this and I call it my monster in the corner.
Your paint job looks really beautiful and I don't think it would have looked the same without all the multi-colored layers, gorgeous!
See, I love the layers... and how they show through when you distress.
Fantastic [as expected]!
Ang
SoLongFarm.blogspot.com
I like the colors.
Post a Comment