
I've been working my little fingers off for my buddy Kris,
as you guys know,
since you're silly enough to be following this story on my blog.
I told you about not being able to find the right colors for her master bedroom,
no matter where we looked for bedding.
Sooooo.....
let me show you what I came up with for her coverlet.
I wanted something that could be turned back at the pillows and look different on the reverse side.
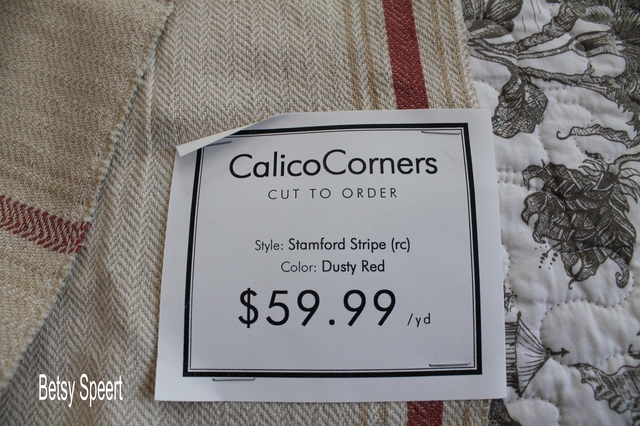
We found this Ralph Lauren fabric.....
As you can see, it looks good on both sides.
.jpg)
We thought we would want the wrong side to be the right side, but it turned out to be wrong.....
The right side actually looked righter!!!!!
Is your head hurting yet?????
The wrong side had knotted threads showing where the weaving joined.
We didn't like that.
Then we realized that the right side was brighter looking and added lightness to the room, which was full of dark colors.
So Kris in her infinite wisdom said
"Use the right side."
and I said....
"Whatever you want!!!!!"
I always give her what she wants.....
unless she's wrong.
Then I don't.
'Cuz I know everything, and she doesn't.....
Because the coverlet would be turned back at the top, it had to look finished on both sides.
I couldn't have an unfinished seam on the back.....
because sometimes the back would be the front.....
(Ow, hurting head here.....)
SOOOOOO.....
I turned to Google and did some research on seams.
I tell you.....
my life is really exciting!!!!!
I found two types of seams
Flat fell hems and French Seams.
I combined the two and created my own detail.
I'M SURE THAT THIS HAS ALREADY BEEN DONE.....
AND MY INVENTION IS NOT MINE.....
BUT I COULDN'T FIND IT AND I MADE THIS UP MYSELF!!!!!
If you figure out something by yourself, that others have figured out before you,
does it count?????
I think so, and I'm taking credit for this!!!!!
I needed to cut the fabric so that the horizontal repeat of the red lines would be the same across the coverlet.
Ralph didn't make it easy on me, and the two selvage edges were different by 1/2".
I needed a larger seam allowance than normal, since I was doing a more complicated joining.
Soooooo.....
MATH WAS INVOLVED!!!!

First I sewed the two pieces together with a 1/4" seam.

Then I ironed the two sides together along the seam.
.jpg)
Then I stitched a second row of stitches, 1/2" in from the edge, using the thickness of my pressure foot to help keep the line straight.
.jpg)
Then I changed to my blind hem pressure foot.
It has a little tab that sticks down in the middle that works really well as a guide to keep your stitches straight,
I ran the tab along the seam edge and stitched another line along the edge, around 1/4" in.

So, it looked like this on the lighter side of the fabric.

I flipped the coverlet over, and stitched the back the same way, adding the line 1/4" in from the seam edge.
This is how it looks on the back.

And...
this is how it ended up looking on the front.

Both sides have a finished seam, and I feel very smahrt.

Now, I just have to hem all the edges.
So,
I took it back over to Kris's house, so we could figure out just how long and wide we wanted it.
I spread it out on the bed.....
.jpg)
and pinned it up to what we wanted it to be.
Kris decided she would like the red line to be the edging on the side.

It's a little longer than what I would usually do, but the red edge will be a nice finishing touch.
The bed still needs to have the dust ruffle made, but we're waiting for Kris's new mattress and boxspring.
Now all I need is some uninterrupted time to sew the dam thing!!!!
My family wont't leave me alone!!!!!
People always say.....
you'll be lonely if you don't get married.
How can I get lonely if my family is around all the time?????
Please.....
just one day where I can sit at my sewing machine or my computer without the phone or doorbell ringing.
Actually.....
I better be careful about complaining, because I really love it and the fates may look down on me and give me what I'm whining about.
Next post I'll show you the shams I made that almost did me in.
I keep thinking I can sew these things in a couple of hours, and they take me three days.
Oy.....
On that note,
Latah, Gatah


.jpg)
.jpg)
.jpg)


.jpg)


11 comments:
Looks good, I do the same thing, I always underestimate project time.
You never cease to make me laugh. I do my 'french seams' like you did. I don't even remember when I started. Who cares, not me. lol I was going to make some drapes yesterday, but....my hubs, (not the girls anymore) used my latest new ones to trim his blueberry bushes. @*&#%@ he has about 10 pairs of my ruined scissors somewhere and he picked mine! Oh well, I'll go get some new ones once these huge clouds coming from all directions, finally rains and clears up. And I will hide my scissors under my mattress.Have fun finishing up. Paula
This will look very nice when you have finished. I don't think I foot like that -- what kind is it? I have done the type of seaming you describe, and it is a perfect solution for your project. Have you left enough for a pillow tuck, or will it be turned back? Do people even use pillow tucks anymore? I am showing my age here, even knowing what that is, I suppose!
That was supposed to be "have" a foot like that -- I really hate this auto-correct thing.
Tom Roth of Weathervane Fabrics - now owned by Stark - has a lot of striped heavy fabrics. the Outlet is off I 95 exit 15 in Norwalk CT. Usually less than $30 a yard. this fabric looks like real grain sack stuff, i have yards and yards of antique grainsack, but it is only 11 inches wide. . Seemed like a good idea at the time.
I really like that fabric and is a toning note to the sweetness of the room. I've also seen something similar using the stripe as a wide bias binding to finish the edge. It looked really great. Your taste and attention to detail is the best. CTD
(Yeah! I can post. It seems to depend what computer I'm using. Go figure.)
French seams are the best, I do mine the same way you did, use them for all kinds of projects, esp. curtains and valences. Yes, I'm in that same boat, my projects always go into days and days!!!
You gave me the re-upholstery bug....I did my dressing table stool that was once my mom's, then did an old oak chair that was my nonns's...........it took half a day to pull out all those staples and those nasty nails they used before staples were invented!!! There was even horsehair stuffing...what a mess that was!! But feeling so schamrt like you!!!
I carefully figure out how long I think a project should take, triple it, and then I'm only a few hours, or days short. Of course I need to add in Pinterest and Bloglovin time....that adds another few hours.
I actually used a seam just like this several years ago when sewing a lined vest for my son! He was at school so I had to wait till he came home for the final fitting.I had to figure out a way to sew everything, while leaving the side seams open AND still have finished seams on both the lining and outer fabric when done. This is a good sewing technique. Apparently we both figured it out very well! :-) Can't wait to see the finished bedding ensemble.
How could the shams possibly have done you in after that chair you just reupholstered? Maybe you are secretly (or not so secretly) a glutton for punishment. Either way I sure do lurve your tutorials. Keep 'em commin. Best, Beth C.
i was pondering that myself once recently...if I had never seen it and thought i invented something did it count the same?? hah, well I think so too. YOu are doing a great job on all that custom work yourself! BRavo and lucky Kris!
Post a Comment