OY!!!!
I've got everything inside out and backwards.....
I meant to show you guys how I sewed the pillow shams before I put them in Kris's master bedroom.....
BUT I GOT CARRIED AWAY WITH THE STUFF WE HAULED HOME!!!!!
Sooooo.....
let me retrench and show you how I sewed her shams.
I figured that they would be a one day project.
I was sooooo wrong.
They took three days, but my labor is free, so it was no skin off Kris's back.
Below is a shot of them in their new home.
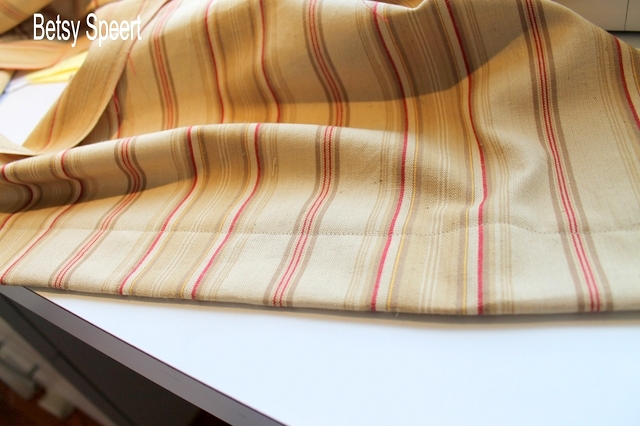
We chose a Ralph Lauren fabric.
It's name is: Haystack Stripe, color: Camel.
I am going to show you in overwhelming detail how I sewed this.
The reason being.....
I am currently making a pair of slipcovers for my Niece Miriam's living room.
I am confused about how to sew the deck under the T cushion.
I bought a book on slipcovers to show me how to do it.....
AND IT SKIPS THE PART WHERE I AM CONFUSED!!!!!
It's a badly organized book to boot.
I am so frustrated.
At least the deck is under the cushion and won't show.
Fries my goat, I tell ya.....
So,
I am going to show you guys all the little steps, as I won't assume you know what I'm doing.
I really don't know what I'm doing.....
I'm faking this as hard as I can.....
but maybe I can help ONE person out there in blog land.
OK,
lets proceed.
First, I had to figure out what size to make them.
Since I hadn't a clue, I looked on the internet to see how other folks had them sized.
I found a couple of different sizes floatin' around, but I figured, Kris would be happy with either one.
Sooooo.....
I cut the fabric for the fronts of the shams one inch larger for the width and length, to accommodate the seam allowance.
The back of the shams was going to have a button closure, so I had to make the back in two pieces.
I added some extra width to allow for the overlap where it would button closed.
For the top piece that would have the button holes, I first folded the fabric under.
Then folded it under again, and pinned it.
Then I seamed it around 1/4" from the inner folded edge, using the width of the pressure foot for my guide.
I can change the needle position to create different seam allowances.
For this, I set the needle in the center of the pressure foot.
This is how it looked on the back.
This is how it looks on the front.
I flipped it back over, and sewed a second seam with the same seam allowance from the edge.
This is how it looked on the front.
Then I sewed a third seam using the left side of the pressure foot for a guide, down the inside seam.
And ..... Voila!!!
a man's shirt detail.
Then I made the other side of the back, the part that would have the buttons sewn on it.
I folded the fabric under twice, and sewed one seam down the edge.
Then I figured out where I wanted the button holes.
I marked the center placement for each button hole with a pin.
This is my button foot.
It is a modern marvel.
Place the button in the slot on the foot.
This will set the size of the button hole, so it is perfect for the button you're using.
Then I moved the pins to the bottom of each button hole, so I would know where to start sewing.
Using the pins as a guide, I set the red line on the button pressure foot to line up with the pin, pulled the pin out and started sewing.....
The machine just knows what to do!!!!!
All you have to do is step on the power foot that makes the machine run!!!!!
Looky, Looky, Looky!!!!!
Then, set a pin at the top of the button hole to act as a stop for your ripper.
carefully poke the ripper through the fabric and rip up to the pin.
There you go!!!!!
You have your button holes set in what looks like a man's shirt!!!!!
It's a simple detail that packs a lot of punch.
I will show you the rest of the sham in my next post.
This was getting long.
I am one hell of a detail girl!!!!!
Yes in deedy do!!!!!
On that note,
Latah, Gatah


.JPG)


.jpg)
.jpg)
.jpg)


5 comments:
Looks great. I need to get one of those fancy sewing machines, so it will sew my button holes automatically, and the buttons too.
Wow! You really are the Queen of Detail (and brave to take on matching those stripes to perfection!).
Hi Betsy, Thanks for the how-to. I'm gonna use this on my next project.
Nicely, nicely done!!
I did the same detail recently for a bedroom at our lake house.... I always like to make the back of my shams as pretty as the front.
Now tell us, what kind of sewing machine do you have?? I have seen older models with a buttonholer somewhat like that, but they were metal, not plastic...I love my Bernina, but the button holes all have to be marked... not nearly as easy as yours....
I have a Babylock, and I LURVE it!
Post a Comment